Boldly Woven Card Tutorial
The layers on this card are definitely simple, but adding ribbon to create a feature on your design is a great way to change up what you can do with your cards. This works for large and small ribbons, so long as you use good adhesive. All these are tacked down using Tear & Tape, which is Stampin' Up!s strongest adhesive. Best yet, it is #simplestamping with a twist (well, at least Lemon Lime Twist).
Product of the Week: 2017-2019 In Colors
This week our Product of the Week is the In Colors that will soon be on their way out. I'm definitely sad to see a couple of these colors go! These colors will soon be on a "while supplies last" basis, but for the month of March, they are fully available. You can get all 5 ink pads in a set, which makes for easy ordering. I want to be sure YOU get your chance to get them before they are gone and also want to be sure you have some designs to use as well. Here is a link to some of the In Color products that will be retiring soon.
Beautifully Detailed Note Card Class Kit
The Beautifully Detailed Laser-Cut Specialty Paper is perfect for making elegant cards that are quick and easy. They look like they took hours to put together, but you’ll have 8 note cards made, ready to use in a snap. They are also perfect for many occasions. This class is paired with the Butterfly Gala Stamp Set for some extra beauty with the butterflies and also for the great sentiments. Best of all, these cards are really fun to put together, especially with all your supplies cut and ready to use!
In-Person, March 31st 2:00-4:00pm at Clarendon Hall: $35
Shipped to your door: $35 + $8.00 Shipping (kits mailed out on or before 3/31/19)
Tutorial Only Option: $10
Included in your class kit:
-Supplies for 8 notecards
-Full pack of Very Vanilla Notecards and Envelopes
-2 sheets of the Beautifully Detailed Laser-Cut Specialty Paper, one in each design
-Full pack of the Share What You Love Artisan Pearls
-Full roll of Very Vanilla Baker’s Twine
-Fine Tip Glue Pen
-1 sheet of Dimensionals
-1 Sponge Dauber
-PDF instructions emailed to you
-exclusive YouTube video tutorial
Registration Due by: March 16th
Email me to register!
Boldly Woven Card Tutorial
 Measurements: (shown for card on right)
Base: Lemon Lime Twist Cardstock, 8 1/2" x 5 1/2", score at 4 1/4"
Layer 1: Berry Burst Cardstock, 3 7/8" x 5 1/8"
Layer 2: Whisper White Cardstock, 3 3/4" x 5"
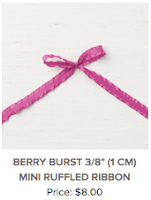
Embellishment: Berry Burst 3/8" Mini Ruffled Ribbon, Lemon Lime Twist 3/8" Mini Ruffled Ribbon
Instructions:
1. Stamp "So Glad...." sentiment in upper-right corner of Layer 2 using Tuxedo Black Memento Ink.
2. On Layer 2, stamp three round flowers just below sentiment in Berry Burst Ink. Also stamp 3-4 small flowers between round flowers and one to the left of the round flowers, about 3/4" away, also in Berry Burst Ink.
3. On Layer 2, stamp the long branch and it's shadow to the left of the round flowers in Lemon Lime Twist. I stamped the full images twice and then the top three leaves between those two times as well. Also stamp just the top leaf from both stamps between the three round flowers to fill in empty space in Lemon Lime Twist.
4. Wrap Layer 2 with Lemon Lime Twist Ribbon two times: once around the bottom about 1/2" from the edge, and up the left side, about 1/2" from the edge. Secure ends to the back using Tear & Tape.
5. Repeat Step 4 using Berry Burst Ribbon, making these go above the bottom length of Lemon Lime Twist, and then to the right of the Ribbon going up the left side. (both of these should be more to the middle of the Layer)
6. Adhere Layer 2 to Layer 1, then adhere both to Base.
Supplies for Today's Tutorial:
Click on the images to shop supplies


No comments:
Post a Comment