Thoughts With You Card Tutorial

Time for some fun this Friday. That splatter texture is easy to make and really fun to do. It's like making your own designer paper! Join me at 2pm on my business page to learn how to do this and more. Can't make it at 2pm? No worries! The video will be posted so you can find it when you're ready!
Beautifully Detailed Note Card Class Kit
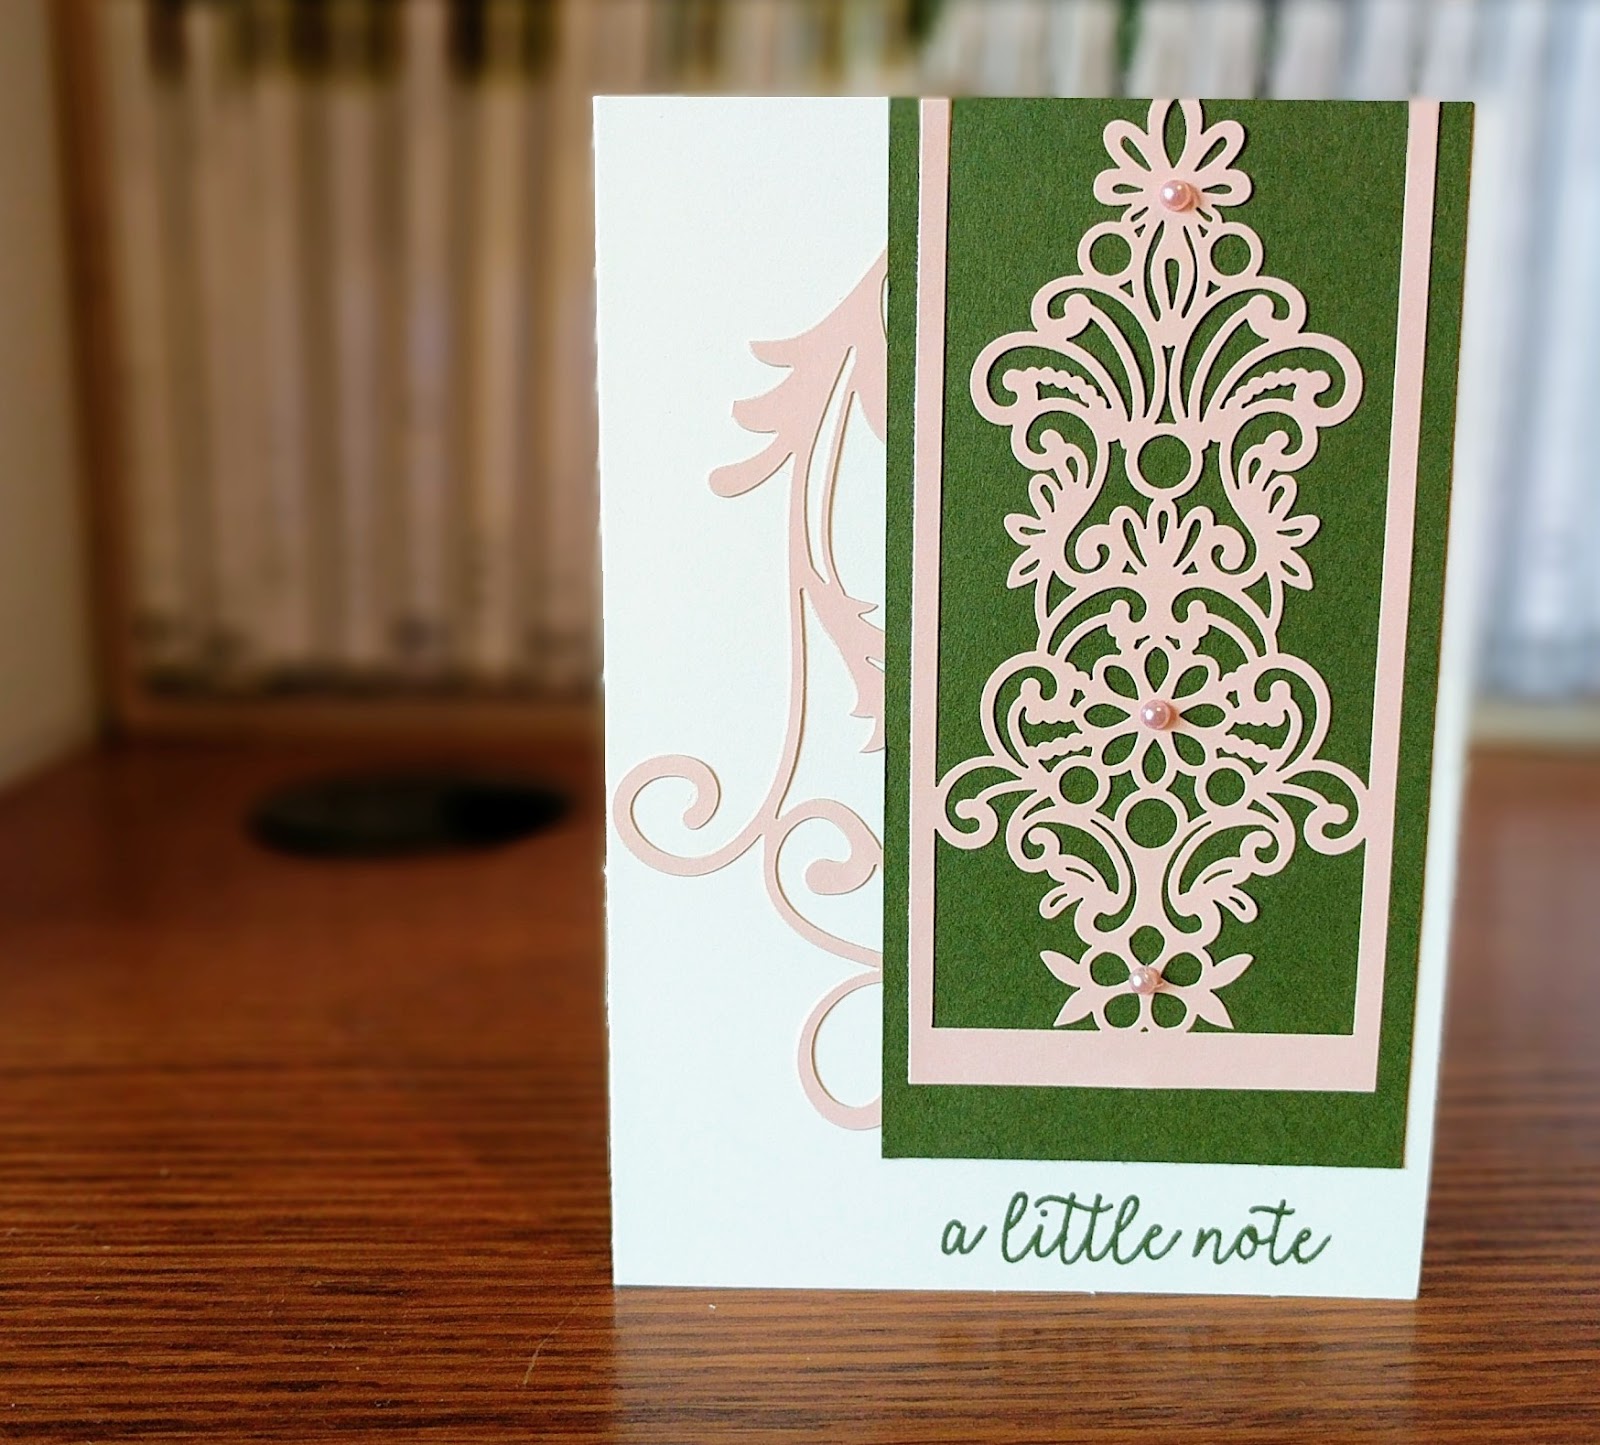

The Beautifully Detailed Laser-Cut Specialty Paper is perfect for making elegant cards that are quick and easy. They look like they took hours to put together, but you’ll have 8 note cards made, ready to use in a snap. They are also perfect for many occasions. This class is paired with the Butterfly Gala Stamp Set for some extra beauty with the butterflies and also for the great sentiments. Best of all, these cards are really fun to put together, especially with all your supplies cut and ready to use!
In-Person, March 31st 2:00-4:00pm at Clarendon Hall: $35
Shipped to your door: $35 + $8.00 Shipping (kits mailed out on or before 3/31/19)
Tutorial Only Option: $10
Included in your class kit:
-Supplies for 8 notecards
-Full pack of Very Vanilla Notecards and Envelopes
-2 sheets of the Beautifully Detailed Laser-Cut Specialty Paper, one in each design
-Full pack of the Share What You Love Artisan Pearls
-Full roll of Very Vanilla Baker’s Twine
-Fine Tip Glue Pen
-1 sheet of Dimensionals
-1 Sponge Dauber
-PDF instructions emailed to you
-exclusive YouTube video tutorial
Registration Due by: March 16th
Email me to register!
2017-2019 In-Colors will soon be retiring!

Powder Pink is a 2017-2019 In Color, which means it is only available for a little longer before we say goodbye. There are 5 In Colors that will be retiring to make way for 5 new colors. I'm definitely sad to see a couple of these colors go!
These colors will soon be on a "while supplies last" basis, but for the month of March, they are fully available. You can get all 5 ink pads in a set. I want to be sure YOU get your chance to get them before they are gone! Here is a link to some of the In Color products that will be retiring soon:
Product of the Week: Lasting Lily Stamp Set


The Lasting Lily Stamp Set is perfect for creating #simplestamping cards. So many sentiments, including sympathy sentiments, and large floral images you that let you build a bouquet to fit your fancy. And now, Stampin' Up! has coordinating framelits available to go with this lovely stamp set. Best of all, it is a Sale-a-Bration item, which means you can get it FREE with a $100 order!
Sympathy cards are important for family, friends and loved ones. Last Lily Stamp Set gives several sentiments that fit the needs for sympathy cards, and gives you a chance to make something personal for those you care about too. I prefer to have a few made up ready to go, so I don't have to think about making one when the need arises.
You can shop with me at juliafair.stampinup.net
Thoughts With You Card Tutorial
Base: Whisper White Thick Cardstock,
8 1/2" x 5 1/2", score and fold at 4 1/4"
Layer 1: Granny Apple Green Cardstock,
2 1/4" x 5 1/2"
Layer 2: Shimmery White Cardstock, 2" x 5 1/2"
Layer 3: Granny Apple Green Cardstock,
3 1/4" x 4 1/4"
Layer 4: Whisper White Cardstock, 3" x 4"
Layer 5: Granny Apple Green Cardstock, 1 1/8" x 2 1/4"
Layer 6: Whisper White Cardstock, 7/8" x 2"
Embellishment: Daffodil Delight 1/4" Double Stitched Ribbon
Instructions:
1. Stamp "Our Thoughts..." sentiment onto Layer 6 with Granny Apple Green Ink.
2. Stamp small lily two times on Layer 4 using Daffodil Delight Ink.
3. Stamp the stem with small leaf on base of each lily stamped on Layer 4 using Granny Apple Green Ink. Also stamp long curved leaf two times with each stem in Granny Apple Green Ink on Layer 4.
4. Adhere Layer 4 to Layer 3. Also adhere Layer 6 to Layer 5.
5. Adhere a length of Ribbon around Layers 3 and 4 about 3/4" from bottom, adhering Ribbon to the back of Layer 3 using Mini Glue Dots.
6. Using an Aqua Painter to splatter Granny Apple Green and Daffodil Delight Inks onto Layer 2. Be sure to squeeze out the extra color before switching colors or they will mix in the pen. Also, pick up ink from the COVER of an ink pad, or use a drop of reinker. Not sure how to do this? Be sure to join me on my Facebook business page for a Live video on how to do this!
7. Once Layer 2 is dry, adhere to Layer 1, then adhere both to the Base about a 1/4" from the fold.
8. Adhere Layers 3 and 4 to Base about 1/2" from left edge.
9. Adhere Layers 5 and 6 to Base overlapping Layers 3/4 on the right-bottom side using Dimensionals.
10. Tie a bow in the Daffodil Delight Ribbon and Adhere over ribbon on Base next to Layers 5/6 using Mini Glue Dots.
Supplies for Today's Tutorial:
Click on the images to shop with me!


No comments:
Post a Comment