Glad We're Friends Card Tutorial
Who knew stamping on top of the Gingham Gala Designer Series Paper (DSP) could make so many more looks? This is the Buffalo Check Background Stamp in Bermuda Bay stamped right over the smaller pattern Gingham Gala in Lemon Lime Twist. The large background stamps are easy to use, but are especially fabulous when stamping with the Stamparatus. If you miss a spot, no worries, just ink again and stamp. The Stamparatus will hold your paper in place with the magnets, and your stamp won't move from the plates, which makes going over your image a second or third time a breeze.
Thursday YouTube Tutorial: Gingham Gala Daisy Card Tutorial
Product of the Week: Gingham Gala Designer Series Paper
The Gingham Gala Designer Series Paper (DSP) is a perfect paper pack for spring. It comes with 5 colors that are bright and coordinate well to give you plenty of design options. You can choose from two patterns as well, with one side of each paper having a larger check pattern and the reverse having a smaller pattern.
Glad We're Friends Card Tutorial
Fable Friends Stamp Set
Fable Friends Stamp Set
Base: Whisper White Thick Cardstock, 8 1/2" x 5 1/2", score and fold at 4 1/4"
Layer 1: Gingham Gala DSP in Lemon Lime Twist, 5 1/4" x 4
Layer 2: Whisper White Cardstock, punch a circle using the 2 1/4" Circle Punch
Embellishments: Whisper White 3/8" Classic Weave Ribbon
Instructions:
1. Stamp the Buffalo Check Background Stamp over Layer 1 in Bermuda Bay Ink.
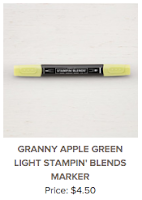
2. Stamp squirrel image onto Layer 2 in Tuxedo Black Memento Ink. Color using Stampin' Blends in Smokey Slate, Bermuda Bay, Daffodil Delight, and Granny Apple Green.
3. Stamp "Glad We're Friends" onto Layer 1 on lower-right side about 1" from the bottom and right side. Stamp in Tuxedo Black Ink.
4. Adhere a length of Whisper White Ribbon horizontally across Layer 1 just above the stamped sentiment, adhering ends to the back of Layer 1 using Mini Glue Dots.
5. Adhere Layer 2 over the ribbon on Layer 1 on the left side using Diminsionals
6. Tie a knot of Whisper White Ribbon on the ribbon on Layer 1 just to the right of Layer 2.
Supplies for Today's Tutorial:
Click on the images to shop with me!


No comments:
Post a Comment