Emboss on Emboss Card Tutorial


Embossing Paste on embossed cardstock...what a way to make fun textures! I did a YouTube tutorial on the techniques for this on Thursday, and here are the cards. So much silver, but the Silver Embossing Paste is retiring, so be sure to get yours ASAP!
Product of the Week: 18'-20' In Color Designer Series Paper


The 18'-20' In Color DSP is bright and bold with stripes and dots, making perfect backgrounds for most any project. It comes with all 5 In Colors with two, double-sided designs in either color with white, or tone-on-tone color.
Emboss on Emboss Card Tutorial
Petal Palette and Picture Perfect Birthday Stamp Sets
Petal Palette and Picture Perfect Birthday Stamp Sets


Base: Night of Navy Cardstock, 8 1/2" x 5 1/2", score and fold at 4 1/4"
Layer 1: Gray Granite Cardstock, 5 1/4" x 4"
Layer 2: Night of Navy Cardstock, 5 1/8" x 3 7/8", emboss with Swirls and Curls Embossing Folder, then spread Silver Embossing Paste
Layer 3: Night of Navy Cardstock, 2 1/2" x 1"
Layer 4: Gray Granite Cardstock, 2 3/8" x 7/8"
Inside Panel: Whisper White Cardstock,
5 1/4" x 4"
Instructions:
1. Adhere Layers 1 to Base using Snail. Adhere Layer 2 on Layer 1 using Tear & Tape.
2. Stamp "Cue the Confetti" sentiment onto Layer 4 in Night of Navy Ink. Adhere Layer 4 to Layer 3 using Snail.
3. Adhere Layers 3 and 4 to lower-left corner of Layer 2 using Dimensionals.
4. Adhere Inside Panel to the inside back of the Base using Snail.
Measurements Card 2:

Base: Gray Granite Cardstock, 8 1/2" x 5 1/2", score and fold at 4 1/4"
Layer 1: Night of Navy Cardstock, 5 1/2" x 4 1/4", emboss with Tin Tile Embossing Folder, then spread Silver Embossing Paste
Layer 2: Night of Navy Cardstock, 1 7/8" x 1 1/8"
Embellishment: Basic Adhesive Back Sequins
Instructions:
1. Tear the top and bottom sides of Layer 1 to expose the Night of Navy Cardstock. Adhere Layer 1 to Base using Tear & Tape.
2. Stamp "Thank You" sentiment onto Layer 2 using Versamark Ink. Heat emboss sentiment with Silver Embossing Powder.
3. Adhere Layers 2 to Layer 1 in lower-left corner using Dimensionals.
4. Embellish Layer 2 with Sequins in a row under the sentiment.
Layer 1: Gray Granite Cardstock, 5 1/4" x 4"
Layer 2: Night of Navy Cardstock, 5 1/8" x 3 7/8", emboss with Swirls and Curls Embossing Folder, then spread Silver Embossing Paste
Layer 3: Night of Navy Cardstock, 2 1/2" x 1"
Layer 4: Gray Granite Cardstock, 2 3/8" x 7/8"
Inside Panel: Whisper White Cardstock,
5 1/4" x 4"
Instructions:
1. Adhere Layers 1 to Base using Snail. Adhere Layer 2 on Layer 1 using Tear & Tape.
2. Stamp "Cue the Confetti" sentiment onto Layer 4 in Night of Navy Ink. Adhere Layer 4 to Layer 3 using Snail.
3. Adhere Layers 3 and 4 to lower-left corner of Layer 2 using Dimensionals.
4. Adhere Inside Panel to the inside back of the Base using Snail.
Measurements Card 2:
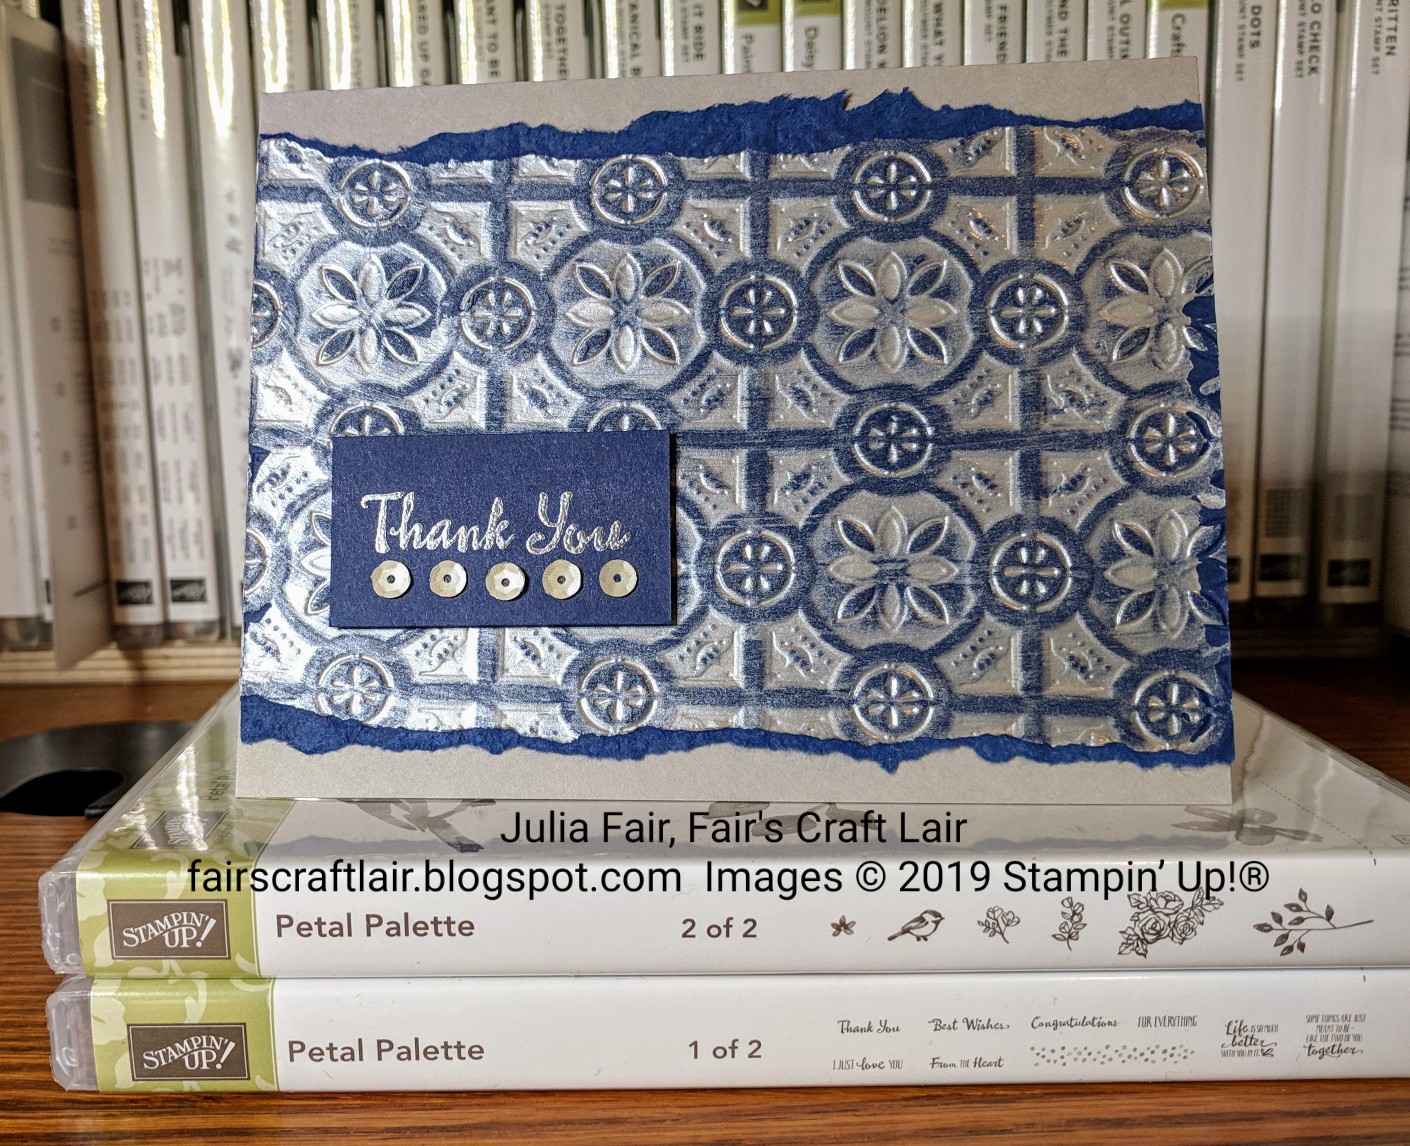
Base: Gray Granite Cardstock, 8 1/2" x 5 1/2", score and fold at 4 1/4"
Layer 1: Night of Navy Cardstock, 5 1/2" x 4 1/4", emboss with Tin Tile Embossing Folder, then spread Silver Embossing Paste
Layer 2: Night of Navy Cardstock, 1 7/8" x 1 1/8"
Embellishment: Basic Adhesive Back Sequins
Instructions:
1. Tear the top and bottom sides of Layer 1 to expose the Night of Navy Cardstock. Adhere Layer 1 to Base using Tear & Tape.
2. Stamp "Thank You" sentiment onto Layer 2 using Versamark Ink. Heat emboss sentiment with Silver Embossing Powder.
3. Adhere Layers 2 to Layer 1 in lower-left corner using Dimensionals.
4. Embellish Layer 2 with Sequins in a row under the sentiment.
Supplies for Today's Tutorial:
Click on the images to shop with me!


No comments:
Post a Comment