Part of My Story Card Tutorial
 I just love this bright and cheery paper! It's part of the Painted Seasons Bundle that is part of Sale-a-Bration, so you can get it FREE with any $100 order. The bundle comes with the Painted Seasons Stamp Set as well, which has beautiful botanical images. I needed some fun paper to go with this week's Product of the Week though: Part of My Story Stamp Set. So I decided today to feature a whole bunch of Sale-a-Bration items. I'll be pairing this wonderful set of sentiments with many different products this week so you'll have lots of options for your crafting needs!

Product of the Week: Part of My Story Stamp Set


The Part of My Story Stamp Set is a great set of sentiments that work for many occasions. Filled with 6 feel-good sentiments, this stamp set is perfect for every day occasions, but can also be used for special occasions as well. Best of all, it is a Sale-a-Bration item, which means you can get it FREE with a $50 order!
Who's Wants to Stamp? I Do! I Do! And I Want to Stamp with YOU!!!

This month I'm offering my card class exclusively to-go, which means all you need to do is register with payment and it will show up to your door, ready for you to stamp whenever you're ready! I'll also be making an exclusive video tutorial so you can stamp along with me.
This month's class will feature the Beauty Abounds Bundle:
Class kit includes:
-supplies for 6 cards, 2 each in 3 designs
-beautiful embellishments to add bling
-YouTube video tutorial so you can craft at your leisure
Things you'll need at home:
-adhesive (Snail, Mini Glue Dots, etc)
-stamp set
-ink
Need the stamp set? Not to worry! There's a great way to get it!
Register by February 28th!
For card kit only, shipped to your door for $22
or
I'll ship it to you for FREE with a $35 order
For card kit only, shipped to your door for $22
or
I'll ship it to you for FREE with a $35 order
Order Suggestions:


Part of My Story Card Tutorial
Part of My Story Stamp Set/Painted Season Stamp Set
Measurements:
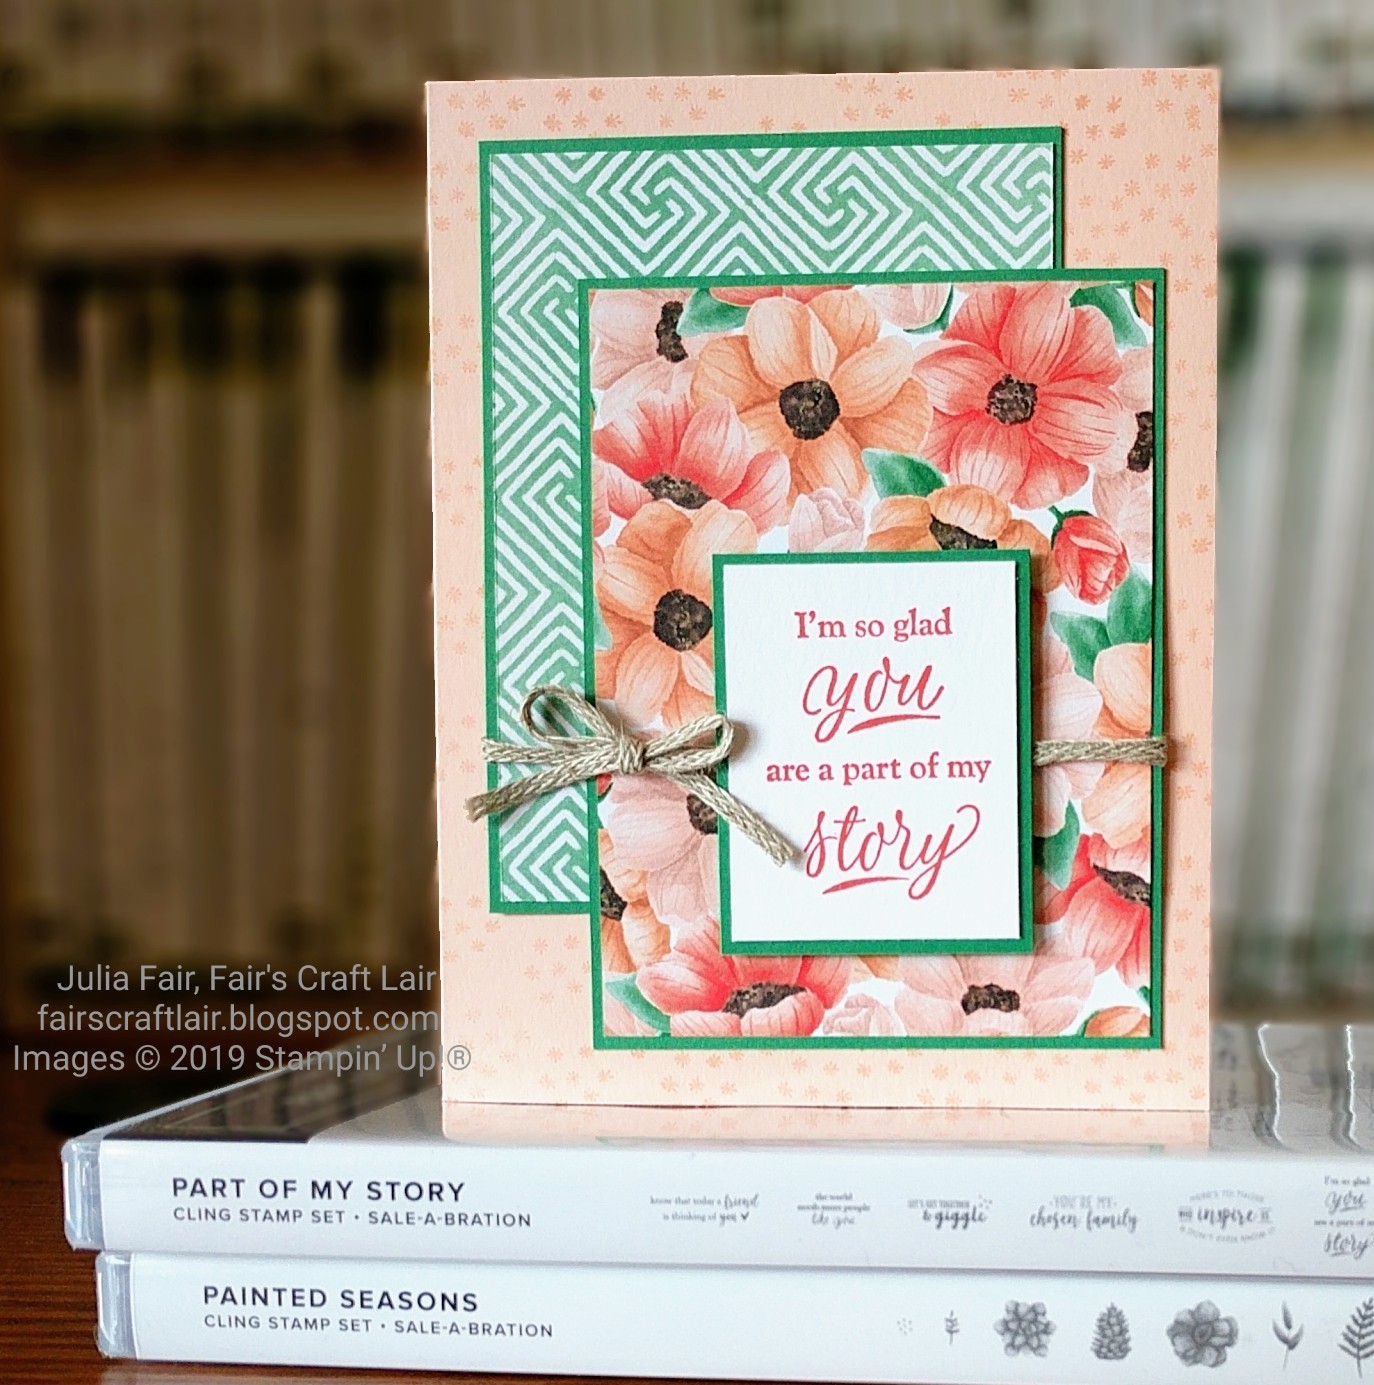
Base: Petal Pink Cardstock, 8 1/2" x 5 1/2", score and fold at 4 1/4"
Layer 1: CUT 2: Call Me Clover Cardstock,
3 1/8" x 4 1/8"
Layer 2: CUT 2: Painted Seasons Designer Series Paper, 3" x 4"
Layer 3: Call Me Clover Cardstock,
2 1/8" x 1 3/4"
Layer 4: Whisper White Cardstock,
2" x 1 5/8"
Embellishments: Braided Linen Trim
Instructions:
1. Stamp "I'm So Glad..." Sentiment onto Layer 4 using Poppy Parade Ink.
2. Stamp the Small Dots around the edges on the Base using Petal Pink Ink.
3. Adhere each piece in Layer 2 to each piece in Layer 1, make sure that the Layer 2 pieces are glued so that you have one of each side showing. Once they are adhered to their respective Layer 1 pieces, lay them on the Base to get the spacing right: green background first laid in upper-left corner, then the floral print laid on lower-right corner. Adhere the Layers together, but DO NOT adhere them to the Base yet!
4. Wrap the adhered Layers 1 and 2 with Braided Linen Trim and adhere to the back side of the Layer 1's using Mini Glue Dots.
5. Adhere Layers 1 and 2 to Base using Snail.
6. Adhere Layer 4 to Layer 3. Then adhere to the floral Layer 2 (bottom-left Layer) centered at the bottom using Dimensionals.
7. Tie a bow with the Braided Linen Trim and adhere to the left of Layers 3 and 4 using Mini Glue Dots. Adhere over the length of Braided Linen Trim already on the card.
Supplies for Today's Tutorial:
Click on the images to shop with me!


No comments:
Post a Comment