Rosy Congrats Tutorial
I am no stranger to attachments, but this one takes the cake. The Everything Is Rosy Product Medley is one of my favorites EVER from Stampin' Up! and I suspect it will be for quite a while. It is simply stunning and again, Stampin' Up! has made it so easy for you to design and coordinate everything you need. The Medley comes with all sorts of eye candy including tags, punch out floral shapes, embellishments, two ribbons, designer series paper, shimmer paint, and let's not forget the stamp set and coordinating dies. All you need is cardstock, ink and adhesive, and you're set!
And, if you purchase this amazing product medley with me, I'll even sweeten the deal some more. I will send you a PDF tutorial with 10 projects for FREE. I love when making projects is super easy, and I love to help you make it even easier! But it's only available while supplies last and during the month of May.
Special of the Month:
I still have some great Sale-a-Bration items left in my supplies and I'm happy to extend the Sale-a-Bration sale for you! Choose a FREE Sale-a-Bration item for every $50 retail you purchase with me. Be sure to email me to place your order!
cre8ivestampers@gmail.com
Product of the Week: Whisper White Narrow
Note Cards and Envelops

These note cards are a perfect size for creating simple or fancy cards. They come with matching envelops, which means all you have to do is the decorating and your done!
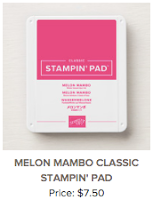
Embellishments: Melon Mambo Ribbon and Rose Gold Shimmer Paint from the Everything is Rosy Medley
Supplies for Today's Tutorial:
Click on the images to shop with me!
Product of the Week: Whisper White Narrow
Note Cards and Envelops

These note cards are a perfect size for creating simple or fancy cards. They come with matching envelops, which means all you have to do is the decorating and your done!
Rosy Congrats Tutorial
Everything Is Rosy Product Medley
Base: Whisper White Narrow Note Card and Envelop
Layer 1: Melon Mambo Cardstock,
4 1/4" x 2 1/4"
Layer 2: Night of Navy Cardstock, 4 1/2" x 7/8"
Layer 3: Whisper White Cardstock, 4" x 2"
Layer 4: Long Tag with holes on both ends from the Everything is Rosy Medley
Layer 1: Melon Mambo Cardstock,
4 1/4" x 2 1/4"
Layer 2: Night of Navy Cardstock, 4 1/2" x 7/8"
Layer 3: Whisper White Cardstock, 4" x 2"
Layer 4: Long Tag with holes on both ends from the Everything is Rosy Medley
Embellishments: Melon Mambo Ribbon and Rose Gold Shimmer Paint from the Everything is Rosy Medley
Instructions:
1. Stamp "Congratulations" sentiment on Layer 4 using Night of Navy Ink.
2. Stamp large flowers and small flowers over Layer 3 using Melon Mambo Ink. To get lighter flowers, simply stamp a second time before re-inking your stamp.
3. Stamp the small flower in the center of the large Melon Mambo flowers on Layer 3. Again, you can make lighter images by stamping a second time before re-inking. Also stamp the small flower cluster between the melon mambo flowers to fill in any spaces using Night of Navy Ink.
4. Take the stylus end of your Take Your Pick Tool and dip it into the Shimmer Paint from the product medley. Paint dots in the centers of each flower on Layer 3. Also, you can add some lines to some of the flowers in the petals. Allow to dry.
5. Adhere Layer 2 over Layer 1 on the Base using Snail. Then adhere Layer 3 using Snail.
6. Run a 4 1/4" piece of Melon Mambo Ribbon through the holes on Layer 4 and adhere Layer 4 to Base using Dimensionals.
5. Adhere Layer 2 over Layer 1 on the Base using Snail. Then adhere Layer 3 using Snail.
6. Run a 4 1/4" piece of Melon Mambo Ribbon through the holes on Layer 4 and adhere Layer 4 to Base using Dimensionals.
Supplies for Today's Tutorial:
Click on the images to shop with me!


No comments:
Post a Comment