You're The Best Card Tutorial
Special of the Month:
I still have some great Sale-a-Bration items left in my supplies and I'm happy to extend the Sale-a-Bration sale for you! Choose a FREE Sale-a-Bration item for every $50 retail you purchase with me. Be sure to email me to place your order!
cre8ivestampers@gmail.com
This box is a perfect starting point for designing cards, tags, gift cards and more. This week I'll be showcasing the products in the Cute Crew Punch Box and adding some coordinating products to help expand the ideas and uses for this great tin collection.
For all of the projects this week, I will be using various papers from the Animal Expedition Designer Series Paper (DSP), and all pieces will be cut the same: 4 1/2" x 2". With the same basic cut DSP, you can design so many things! I hope you enjoy this week's focus and I hope it inspires you to create your own. Please share you creations in the Lair on Facebook too! We love to inspire one another.
Special of the Month:
I still have some great Sale-a-Bration items left in my supplies and I'm happy to extend the Sale-a-Bration sale for you! Choose a FREE Sale-a-Bration item for every $50 retail you purchase with me. Be sure to email me to place your order!
cre8ivestampers@gmail.com
Product of the Week: How Cute Crew Punch Box
You're The Best Card Tutorial
How simple can it be to design with a set of products specifically made to work together? The Cute Crew Punch Box has a great selection of products to help you off to a great start stamping and coloring. All you need to add is paper and adhesive!
This beautiful tin comes with a stamp set that has 6 mini images and sentiments, a block for you to stamp those images, an ink spot for stamping, a punch that coordinates with all the stamps, and 4 watercolor pencils, including one color of pencil that is exclusive to this box: Call Me Clover.
You're The Best Card Tutorial
Cute Crew Punch Box
Base: Whisper White Narrow Notecard and Envelop
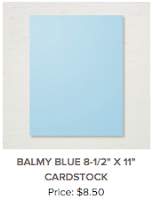
Layer 1: Balmy Blue Cardstock,
4 1/2" x 2 1/4"
Layer 2: Animal Expedition DSP, 4 1/2" x 2"
Layer 3: Balmy Blue Cardstock, Punch one tag shape from the Cute Crew Tag Punch
Layer 4: Whisper White Cardstock, Punch one tag shape from the Cute Crew Tag Punch
Embellishments: Basic Black Shimmer Ribbon
Instructions:
1. Stamp "You're The Best" image onto Layer 4 using the Black Ink Spot (or use Tuxedo Black Memento Ink).
2. Color the stamped image on Layer 4 using the watercolor pencils from the kit (or use the set of Watercolor pencils from Stampin' Up!). You can use a Blender Pen to blend the colors from the pencils together a bit.
3. Cut Layer 3 in half horizontally. Adhere both pieces to the back of Layer 4 leaving a border on the top and bottom to frame Layer 4.
4. Adhere Layers 1 and 2 to Base using Snail.
5. Adhere a folded length of the Black Shimmer Ribbon to the middle of Layer 2 using Mini Glue Dots.
6. Adhere Layers 3 and 4 over the Black Shimmer Ribbon on Layer 2 using Dimensionals.
Supplies for Today's Tutorial:
Click on the images to shop with me!


No comments:
Post a Comment