Tea Room Tutorial - You Fill My Cup with Happiness
For Sunday, I thought a simpler design using the lovely Team Room Bundle would be excellent. I am sticking with the colors from the Designer Series Paper (DSP) in case you'd like to update any of these designs with the DSP. Although the layout is more simple, the stamping is a bit more involved, using three colors of ink. Layers of trim and ribbon also add texture and interest. Hope you enjoy the tutorial below. And as always, you can purchase any of the supplies on my Stampin' Up Demonstrator Website (store) by clicking the product images in the supply list.
Happy Stamping!
For Classes and Workshops click HERE!!!!
Julia Sharpe Fair
cre8ivestampers@gmail.com
Fair's Craft Lair on Facebook
juliafair.stampinup.net
You Fill My Cup With Happiness Card Tutorial
cre8ivestampers@gmail.com
Fair's Craft Lair on Facebook
juliafair.stampinup.net
You Fill My Cup With Happiness Card Tutorial
Tea Room Product Suite
Base: Very Vanilla Thick Card Stock, 8 1/2" x 5 1/2" folded at 4 1/4", landscape style
Layer 1: Calypso Coral Card Stock 5 1/4" x 4", emboss with Petal Pair Embossing Folder with lines.
Layer 2: Very Vanilla Card Stock 3 1/4" x 2 3/4"
Layer 3: Very Vanilla Lace Trip and Tea Room Ribbon, Copper Metallic Thread
Layer 4: Very Vanilla Card Stock, 3" x 1 1/2"
Layer 4: Very Vanilla Card Stock, 3" x 1 1/2"
Instructions
1. Stamp Tea Cup image using Calypso Coral Ink on Layer 4. Add Wink of Stella to details on the cup.
2. Cut bottom edge of Layer 2 with Scallop Edgelit in die set. Stamp outline leaf pattern 2 times filling bottom on Layer 3 using Pear Pizzazz Ink. Stamp "You Fill..." sentiment towards top of Layer 3 in Old Olive Ink (leave about 1/4" at top).
3. On Layer 2, put a small amount of Snail in the middle of the leaves at bottom. Wrap Copper Metallic Thread around 4 fingers on one hand about 5 times, and tack to the Snail on leaves. Using Dimensionals, adhere Layer 4 on top of leave and Copper Thread on Layer 2.
3. On Layer 2, put a small amount of Snail in the middle of the leaves at bottom. Wrap Copper Metallic Thread around 4 fingers on one hand about 5 times, and tack to the Snail on leaves. Using Dimensionals, adhere Layer 4 on top of leave and Copper Thread on Layer 2.
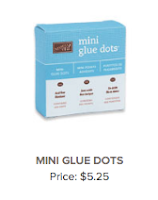
4. Using Snail, adhere Layer 2 to Layer 1 on right bottom side. Adhere Layer 3 across card width using Glue Dots on back to secure. Lace and ribbon should cover top edge of Layer 2. Tie a Lace Trip knot at top left corner of Layer 2, and add a ribbon bow over the top of the knot, securing with Glue Dots.
5. Adhere assembled Layer 1 to Base.
5. Adhere assembled Layer 1 to Base.
You Fill My Cup With Happiness Card Supply List


No comments:
Post a Comment