Fabulous Friday with a Facebook Live!!!!

Today is the last day for me to play with the Garden Impressions product suite and do I have a fabulous card tutorial for you today! This one has fancy techniques and fun tips to help you amp up your stampin'! But what's the fun of just reading about it? Ok, so my blog post will definitely have all the measurements and tutorial for you. BUT, the Facebook Live will show you how I did it.
Hope you can join me at 4pm in the group Fair's Craft Lair. Not a member? That's ok! Ask to join my group and that's it, you're in! Can't make it at 4pm? That's ok too! I'll be sharing the recording and keeping it in the Lair so you can view it when you're ready.
Thank You Card Tutorial with Garden Impressions
Base: Shaded Spruce Card Stock, 8 1/2" x 5 1/2" folded at 4 1/4" oriented in landscape
Layer 1: Whisper White Card Stock 5 1/4" x 4"
Layer 2: Shaded Spruce Card Stock, 5 1/4" x 1/4"
Layer 3: Shaded Spruce Card Stock 5 1/4" x 3/4"
Layer 2: Shaded Spruce Card Stock, 5 1/4" x 1/4"
Layer 3: Shaded Spruce Card Stock 5 1/4" x 3/4"
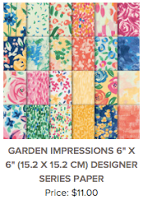
Layer 4: Garden Impressions DSP, cut out large flowers and leaves
Embellishments: Metallic Pearls
Instructions
1. Stamp "Thank you" sentiment using Pacific Point on Layer 1 in bottom right corner.
2. Mask the top and bottom of a 1 3/4" horizontal strip on Layer 1, about 3/4" from top. Stamp various flowers and leaves in the strip. Flowers stamped in Melon Mambo and Pacific Point. Leaves stamped in Shaded Spruce and Soft Sea Foam Inks.
2. Mask the top and bottom of a 1 3/4" horizontal strip on Layer 1, about 3/4" from top. Stamp various flowers and leaves in the strip. Flowers stamped in Melon Mambo and Pacific Point. Leaves stamped in Shaded Spruce and Soft Sea Foam Inks.
2. Remove masking from Layer 1 and adhere to Base. Adhere Layer 2 at top edge of floral stamping on Layer 1. Adhere Layer 3 to bottom edge of floral stamping on Layer 1.
3. Using Snips, cut out 2 flowers and 2 leaves from the large flower DSP. Adhere to Layer 3 using Dimensionals.
4. Embellish with Metallic Pearls, using gold for the center of the DSP flowers and silver on Layer 3.
3. Using Snips, cut out 2 flowers and 2 leaves from the large flower DSP. Adhere to Layer 3 using Dimensionals.
4. Embellish with Metallic Pearls, using gold for the center of the DSP flowers and silver on Layer 3.
Garden Impressions Butterfly Card Supply List
Click on the images below to shop for each product in my store!
Click on the images below to shop for each product in my store!


No comments:
Post a Comment