Gabled Gift Box and Tag Tutorial
Today is the final day of the Snowflake Showcase. If you've been eyeing any of these products, please contact me to order or order on my store because they will be gone tomorrow. I love how the images in this set can layer and create amazing patterns. Four soft shades of blue and green are used to create this beautiful pattern on the box and some of the pattern is repeated on the tag. Regardless of what you gift, this Gable Box and gift tag will be sure to bring a smile to those who receive them. I'll show you how to stamp this in the Facebook video for today!
Just a few more days to get these wonderful coordinated products in the Snowflake Showcase. The Snowfall Thinlits Dies coordinate with BOTH stamp sets and will cut out many images from both the Snow is Glistening and Happiness Surrounds Stamp Sets. Many of these images are also usable year-round, creating floral images as well as the snowflake images. Order yours today before they are gone!
Going on Now:
Christmas Class Available Now, Registration for December Ends December 5th!
Christmas is coming! Join me each month to make a set of 4 cards so you're ready for all your holiday merriment and gift-giving. Register for one or attend them all!! Each month you will receive:
-December projects are a surprise, and no, it won't be cards!
-In person will have refreshments and merriment
December 22nd (Sat), 10:00am-12:00: It's still a surprise!!!!
Register by Dec. 5th to reserve your seat/kit!
In person each month is $15 or FREE with a qualifying order of $25 or more (or you can pick it up)
Order yours shipped to your door for $22, or I'll ship it to you for FREE with a $35 order
Gabled Gift Box and Tag Tutorial
Happiness Surrounds Stamp Set and Snowfall Thinlits Dies
Measurements:
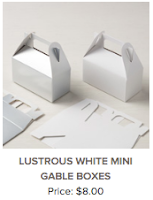
Base: Lustrous White Mini Gable Box
Base: Lustrous White Mini Gable Box
Layer 1: Whisper White Card Stock, 2" x 4" punch one end with Scalloped Tag Topper Punch
Embellishment: Rhinestone Basic Jewels, Silver 3/8" Metallic-Edge Ribbon
Instructions:
Gable Box:
1. Stamp large medallion image in Balmy Blue on the center of each side of the box. It is ok for the medallion to continue onto the connecting side of the box. If you have a little of the medallion continue onto one side, be sure to
stamp about the same amount onto the other side!
2. Stamp striped flower in the center of each medallion in Pool Party Ink.
3. Stamp small solid flower in the middle of each medallion, to the right and left of each medallion, and above the medallions centered above the flowers stamped below. Stamp all in Mint Macron Ink.
4. Stamp border image along the top of each closing panel in Coastal Cabana Ink. Also stamp leaf-petal flower centered over solid Mint Macron flowers that are on the right and left side of the large medallions.
5. Add a Rhinestone to the center of each Mint Macron flower. Assemble box and tie bow in ribbon around the handle.
Gift Tag Instructions
1. Stamp large medallion in Balmy Blue Ink centered on tag.
2. Stamp striped flower in the center of the large medallion in Pool Party Ink.
3. Stamp small solid flower on the bottom two corners, and in similar position towards the top of the tag in Mint Macron Ink.
4. Stamp "It's Your Day" sentiment in the middle of the medallion using Tuxedo Black Memento Ink.
5. Tie bow in Metallic-Edge Ribbon on top of tag.
Instructions:
Gable Box:
1. Stamp large medallion image in Balmy Blue on the center of each side of the box. It is ok for the medallion to continue onto the connecting side of the box. If you have a little of the medallion continue onto one side, be sure to
stamp about the same amount onto the other side!
2. Stamp striped flower in the center of each medallion in Pool Party Ink.
3. Stamp small solid flower in the middle of each medallion, to the right and left of each medallion, and above the medallions centered above the flowers stamped below. Stamp all in Mint Macron Ink.
4. Stamp border image along the top of each closing panel in Coastal Cabana Ink. Also stamp leaf-petal flower centered over solid Mint Macron flowers that are on the right and left side of the large medallions.
5. Add a Rhinestone to the center of each Mint Macron flower. Assemble box and tie bow in ribbon around the handle.
Gift Tag Instructions
1. Stamp large medallion in Balmy Blue Ink centered on tag.
2. Stamp striped flower in the center of the large medallion in Pool Party Ink.
3. Stamp small solid flower on the bottom two corners, and in similar position towards the top of the tag in Mint Macron Ink.
5. Tie bow in Metallic-Edge Ribbon on top of tag.
Flowery Gift Bag Supply List


