Thursday, March 28, 2019

Thankful Thursday with Wonderful Romance

Floral Romance Card Tutorial
The Floral Romance Designer Series Paper (DSP) is part of the Floral Romance Product Suite and coordinates with the Wonderful Romance Stamp Set.  The large floral image colors beautifully with Stampin' Blends.  If you haven't seen them, be sure to tune in to my Facebook Live Friday morning and I'll show you how.

Thankful Thursday
I have loads of gratitude for my husband and I tell him as often as I can, but today I need to share how wonderful he is.  I was able to take my mom to a Stampin' Up! retreat with a lot of my friends who are fellow demonstrators this past weekend so she could start meeting some people.  I couldn't have done this without him and I certainly couldn't be doing Stampin' Up! without his support either.  Thank you Matt for helping me to be a part of this wonderful community and I'm so grateful my mom will get to be a part of it now as well.

Product of the Week: Wonderful Romance Stamp Set
The Wonderful Romance Stamp Set has three sentiments that are great for many occasions.  It also includes beautiful line-drawn floral images that are excellent for coloring with Stampin' Blends.

Floral Romance Card Tutorial
Wonderful Romance Stamp Set

Measurements:

Base: Petal Pink Cardstock, 8 1/2" x 5 1/2", score and fold at 4 1/4"
Layer 1: Whisper White Cardstock,
5 1/2" x 3 1/8"
Layer 2: Floral Romance DSP Vellum,
5 1/2" x 3"
Layer 3: Fresh Fig Cardstock,
4 1/8" x 3 1/8"
Layer 4: Whisper White Cardstock   4" x 3"

Embellishments: Fresh Fig 1/8" Sheer Ribbon

Instructions:

1.  Stamp "Thinking of You" sentiment onto Base in lower-right corner with Tuxedo Black Memento Ink.

2. Adhere Layer 2 to Layer 1 using Snail.  Then adhere to Base about 1/4" from top.

3.  Stamp large floral image on Layer 4 using Tuxedo Black Memento Ink.  Color using Stampin' Blends.

4.  Adhere Layer 4 to Layer 3 using Snail.

5.  Adhere a length of Fresh Fig Ribbon around the bottom-left and top-right corners of Layer 3 and 4.  Adhere ends to the back of Layer 3 using Mini Glue Dots.  Tie a bow in ribbon and adhere on top of ribbon on bottom-left corner using Mini Glue Dots.

6.  Adhere Layers 3 and 4 to Base on left side.


Supplies for Today's Tutorial:
Click on the images to shop with me!

Wednesday, March 27, 2019

Quick Tip Wednesday with Wonderful Romance

Lavender Sentiments Card Tutorial
The Botanical Butterfly Designer Series Paper (DSP) looks lovely with most any sentiment from the Wonderful Romance Stamp Set.  It won't be around much longer, so I'm enjoying it while it's available.  The floral images in the DSP also go well with the floral stamp images in the Wonderful Romance Stamp Set.  

Tip of the Day
Can't find the right size ribbon or trim?  Your thin ribbons can do more than you think!  Double or triple them up on your projects to create a thicker bow, or thicker wrap.  It gives the impression of a thicker wrap or bow.

Product of the Week: Wonderful Romance Stamp Set
The Wonderful Romance Stamp Set has three sentiments that are great for many occasions.  It also includes beautiful line-drawn floral images that are excellent for coloring with Stampin' Blends.

Lavender Sentiments Card Tutorial
Wonderful Romance Stamp Set

Measurements:

Base: Smoky Slate Cardstock, 8 1/2" x 5 1/2", score and fold at 4 1/4"
Layer 1: Whisper White Cardstock,
4 1/8" x 5 3/8"
Layer 2: Botanical Butterfly DSP   5" x 4"
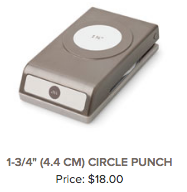
Layer 3: Smoky Slate Cardstock, punch with 2" Circle Punch
Layer 4: Whisper White Cardstock, punch with
 1 3/4" Circle Punch

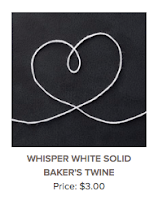
Embellishments: Whisper White Solid Baker's Twine

Instructions:

1.  Stamp "You Are the Best..." sentiment onto Layer 4 with Smoky Slate Ink.

2. Adhere Layer 4 to Layer 3 using Snail.

3.  Adhere Layer 2 to Layer 1 at top using Snail.

4.  Wrap length of Ribbon around Layer 1 and 2 three times, adhering the ends to the back of Layer 1 using Snail.

5.  Adhere Layers 1 and 2 to the Base using Snail.

6.  Adhere Layers 3 and 4 to Layers 1 and 2 over the Ribbon on the bottom-left side using Dimensionals.

7.  Tie a bow using two pieces of Baker's Twine together and adhere to the bottom of Layer 4 using a Mini Glue Dot.

Supplies for Today's Tutorial:
Click on the images to shop with me!

Tuesday, March 26, 2019

YouTube Tuesday with Paper Pumpkin

Poppin' Paper Pumpkin Alternative Project Tutorial

Stampin' Up! has done it again!  Last year for the 5 year anniversary of Paper Pumpkin, they added a special gift, and they did it again this year too!  Everyone who ordered the March Paper Pumpkin kit received an extra stamp set in their kit, and it's AMAZING!  Be sure to watch my YouTube tutorial made especially for YOU, so you can get extra inspiration on how to use your Paper Pumpkin kits!  I've created alternative projects using the kit AND the extra stamp set.
Right now, you can get even more bang for your buck with Prepaid Paper Pumpkin subscriptions.  Purchase a 3, 6, or 12 month subscription and earn free Sale-a-Bration items with your subscription.  Sale-a-Bration only runs through March 31st so be sure to get your subscription soon so you can pick out your Sale-a-Bration freebies!

YouTube Tuesday Tutorial: March 2019 Paper Pumpkin Alternative

Product of the Week: Wonderful Romance Stamp Set
The Wonderful Romance Stamp Set has three sentiments that are great for many occasions.  It also includes beautiful line-drawn floral images that are excellent for coloring with Stampin' Blends.

Poppin' Paper Pumpkin Alternative Project Tutorial
 Poppin' Birthday March 2019 Paper Pumpkin

Measurements:

Full Card:
Base: Whisper White Thick Cardstock, 8 1/2" x 5 1/2", score and fold at 4 1/4"
Layer 1: Polka Dot Card Base, 4" x 5 1/4"
Layer 2: Daffodil Delight Banner
Layer 3: Three Half Cake Layers
Layer 4: Whisper White Cardstock, 1/2" x 6"

Embellishments: Poppy Parade 1/2" Textured Weave Ribbon

Narrow Note Card:
Base: Whisper White Narrow Note Card and Envelop
Layer 1: Flirty Flamingo Cardstock, punch two shapes with Story Label Punch
Layer 2: Whisper White Cardstock, punch one shape with Story Label Punch
Instructions:

Watch the video tutorial!


Supplies for Today's Tutorial:
Click on the images to shop with me!