Tuesday, June 4, 2019

Time For Some New Colors Tuesday with Love What You Do

Beautiful Day For New In Colors Card Tutorial
It's the very first day of the new 19-20 Annual Catalog, and my goodness, it is stocked with tons of fun ideas and supplies.  I'm looking forward to the new Designer Series Papers for sure, but there are so many things to look at and use that it is sometimes hard to start.
So today I'm sharing the new In Colors:

Rococo Rose
Terracotta Tile
Pretty Peacock
Seaside Spray
Purple Posy


Beautiful Day For New In Colors Card Tutorial
Love What You Do Stamp Set

Measurements:


Base: Crumb Cake Cardstock, 5 1/2" x 8 1/2", score and fold at 4 1/4"
Layer 1: Rococo Rose Cardstock, 5" x 3 3/4"
Layer 2: Whisper White Cardstock, 3 1/2" x 4 3/4"
Layer 3: Rococo Rose Cardstock, 4 3/4" x 1"
Layer 4: Rococo Rose Cardstock, Punch TWO flowers from the Four-Petal Flower Punch
Layer 5: Sparkle Glimmer Paper, Punch ONE 1/2" Circle

Embellishment: Whisper White Polka Dot Tulle Ribbon

Instructions:

1.  Stamp "It's a Beautiful Day" on bottom, right corner of Layer 2 using Rococo Rose Ink.

2.  Adhere Layer 3 to top of Layer 2 using Snail.

3.  Wrap Polka Dot Tulle over Layer 3 and adhere to the back of Layer 2 using Snail.

4.  Adhere Layers 2 and 3 to Layer 1 using Snail.  Adhere all to Base using Snail

5.  Adhere Layer 4 together, with petals offset, use Mini Glue Dots.  Adhere Layer 5 to the center of Layer 4, then adhere both to left side of Layer 3 using Mini Glue Dots.

Supplies for Today's Tutorial:
Click on the images to shop with me!
 (In Colors will be added soon!)

Monday, June 3, 2019

Make It Monday with Petal Palette

Better Life Card Tutorial
One final card to say goodbye to the Annual Catalog before we start the new one with a new Stampin' Up! year.  Petal Palette Stamp Set has been a favorite and go-to for many stampers since it came out, but it is retiring today.  There are coordinating dies for this stamp set as well called Petals and More Thinlit Dies, but I didn't need to use the dies to make a cute and fun card.  Rich Razzleberry and Blackberry Bliss colors look great on Crumb Cake Cardstock.  It gives a more a antique feel but looks rich with the Rich Razzleberry Velvet Ribbon.

SALE!!!! SALE!!!! SALE!!!!
04.15.19_TH_SHAREABLE_RETIRING_LIST_NA
We don't always get an end-of-catalog sale, but when we do.....
Sale starts at 2pm EST today and there will be lots of retiring products available at a discount.  Be sure to check out the Clearance Rack as well!


Better Life Card Tutorial
Petal Palette Stamp Set
Measurements:

Base: Crumb Cake Cardstock, 5 1/2" x 8 1/2", score and fold at 4 1/4"

Embellishment: Rich Razzleberry Velvet Ribbon, Share What You Love Artisan Pearls

Instructions:

1.  Stamp "Life Is So Much Better...." on bottom, right corner of Layer 1 using Blackberry Bliss Ink.

2.  Stamp choice of small floral spray in upper left corner repeatedly (about 6 times) using Rich Razzleberry Ink.

3.  Wrap Base with Velvet Ribbon and tie knot on front over the stamping in upper, left corner.  Secure with a Mini Glue Dot.

4.  Embellish floral sprays with Artisan Pearls, about 6.


Supplies for Today's Tutorial:
Click on the images to shop with me!

Sunday, June 2, 2019

Simple Sunday with Eastern Beauty

Circles and Smiles Note Card Tutorial
A simple card can bring a smile, and also show someone how much you care.  A #simplestamping tutorial for the Eastern Beauty Stamp Set before it retires.  There is a marvelous set of coordinating dies for this stamp set: Eastern Medallions.  And who wouldn't want a great deal to get them?  The dies are on sale since they are retiring as well!

Circles and Smiles Note Card Tutorial
Eastern Beauty Stamp Set
Measurements:

Base: Whisper White Narrow Note Card and Envelop

Embellishments: Share What You Love Artisan Pearls

Instructions:

1.  Stamp "To Think of You..." on bottom, left corner of Base using Gray Granite Ink.

2.  Stamp choice of circle stamp 4 times on Base from top, left to bottom, right corner in Petal Pink Ink.

3.  Adhere choice of Artisan Pearls to Base.

Supplies for Today's Tutorial:
Click on the images to shop with me!

Saturday, June 1, 2019

Super Saturday with Treat Time

Sour Cream Treat Tutorial
Too cute to not share!  I've had the pleasure of making some really fun party favors for an event recently, and these sour cream containers are a really fun and easy way to make a container without a die or a punch.  All you need is some good, strong adhesive.  I'll be showing you how to make them on our Tuesday Facebook Live too, so be sure to tune in!

A side note: most of these products will be retiring in just a few days, so be sure to shop soon if you want anything before it's gone.  You also may just find that some of the things you are looking for are on sale too!

Sour Cream Treat Tutorial
Treat Time Stamp Set
Measurements:

Base: Twinkle Twinkle DSP, 6" x 6"
Layer 1: Twinkle Twinkle DSP, 2" x 4"
Layer 2: Whisper White Cardstock, small tag from punch in the Darling Label Punch Box, or use the tag die from the Petite Treat Framelits

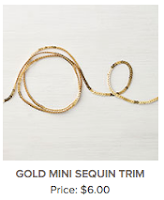
Embellishment: Gold Sequin Trim, Gold Library Clip

Instructions:

1.  Stamp "Time To Celebrate" on Layer 2 using Night Of Navy Ink.

2.  Adhere a 5" length of Gold Sequin Trim folded to Layer 1 using Mini Glue Dots.

3.  Adhere Layer 2 to Layer 1 over Sequin Trim using Dimensionals.

4.  Use Gold Library Clip to attach tag to Sour Cream Container once done.

For Sour Cream Container

1.  Apply Tear & Tape along one complete edge of the Base.  Roll the paper into a tube, using the Tear & Tape to adhere it together along the seam.  Should be cylinder, or round tube.

2.  On one end, apply about 2" of Tear & Tape inside the edge of the tube.  Flatten the tube to close that end, completely.

3.  Repeat Step 2 on the other end, but make the folds go the other direction from the other end (perpendicular, or if one end is horizontal, the other end needs to be vertical).  Do not apply adhesive until you fill it with whatever treat you have!  Also, you will use the Library Clip to close it, so it does not require adhesive.

Supplies for Today's Tutorial:
Click on the images to shop with me!